[How To] Set MSI App Player runs with the discrete GPU on AMD platform
Answer
This article applies to all MSI laptops equipped with an AMD platform.
Follow the steps below to switch MSI App Player to run on the dedicated graphics card for an optimized gaming experience.
Step 1: Assign Dedicated Graphics in Windows Graphics Settings
1.Right-click on an empty area of the desktop, select "Display settings", and navigate to "System" → "Display" → "Graphics"
2.Click "Add an app", select "Desktop app" from the dropdown menu, then click "Browse"
3.Navigate to C:\Program Files\BlueStacks_msi5, select "HD-Player.exe", and click "Add"
4.Find "MSI App Player" in the list and click "Options"
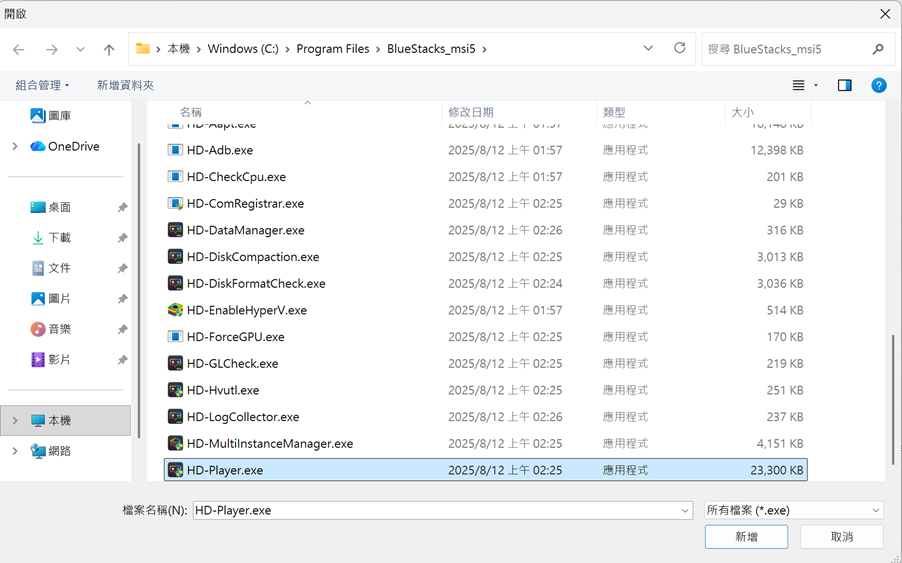
5.Set the graphics preference to "Specific GPU", select your dedicated graphics card, then click "Save"
Step 2: Confirm Dedicated Graphics is Active in MSI App Player
1.Launch MSI App Player and open the Settings page
2.Click "Graphics" on the left panel and check the "GPU in use" field to confirm the dedicated graphics card is currently selected
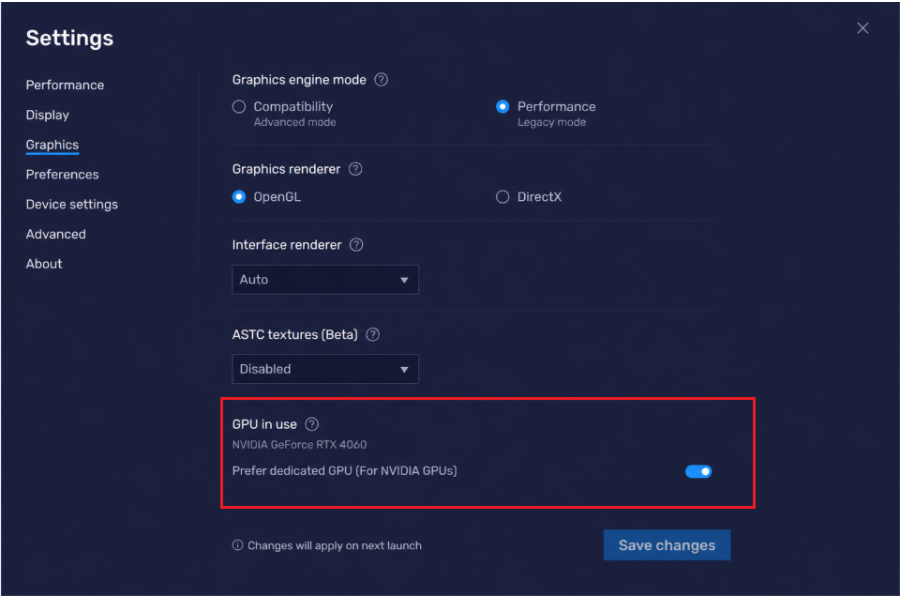
Note: The "Prefer dedicated GPU (for NVIDIA GPU's)" option is not applicable for AMD graphics cards. For AMD platforms, please use the "Specific GPU" option in Windows Graphics Settings as described in Step 1.