


How to setup RAID?
Please select the instructions below according to the chipset model
How to setup RAID array for Intel chipset
Upon powering on the PC, please start hitting the [Del] key continuously to enter the BIOS menu,
Select [SETTINGS] → [Advanced] → select [Windows OS Configurations] → Set [ Windows 10 WHQL Support] as [UEFI].
Select [SETTINGS] → select [advanced] → Set [SATA mode] as [RAID/Optane Mode].
Press [F10] → Select [Yes] to save and exit, the PC will restart.
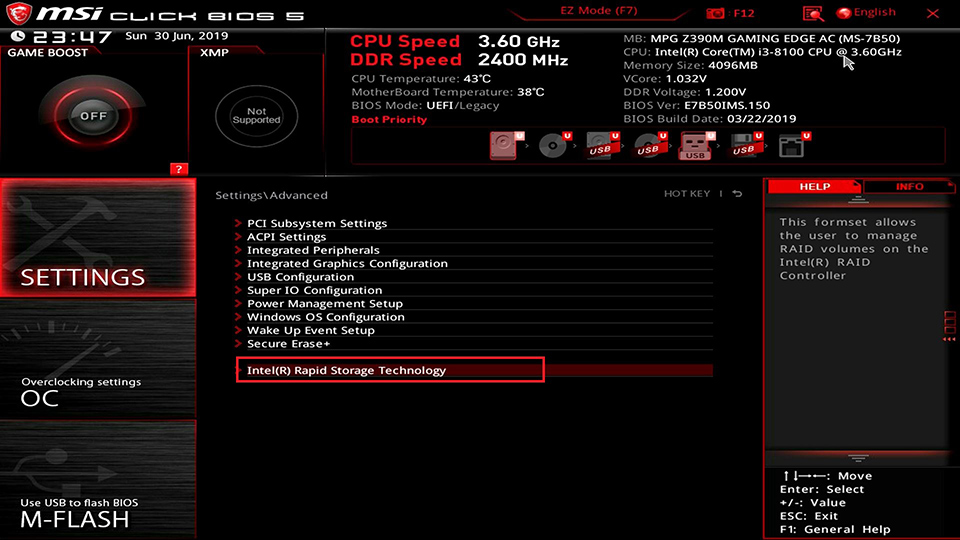
Upon powering on the PC, please start hitting the [Del] key continuously to enter the BIOS menu,
Select [SETTINGS] → [Advanced] → select [Intel(R) Rapid Storage Technology].
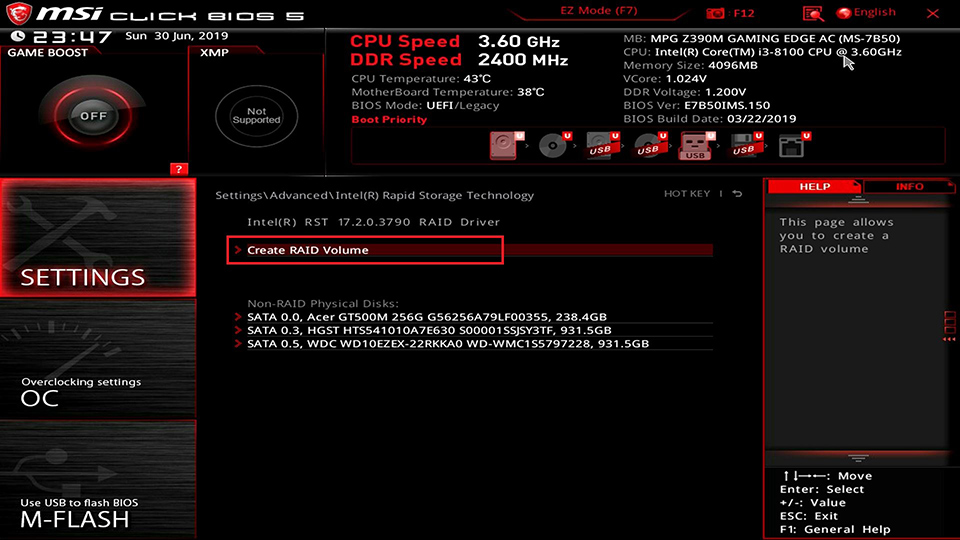
Select [Create RAID Volume]
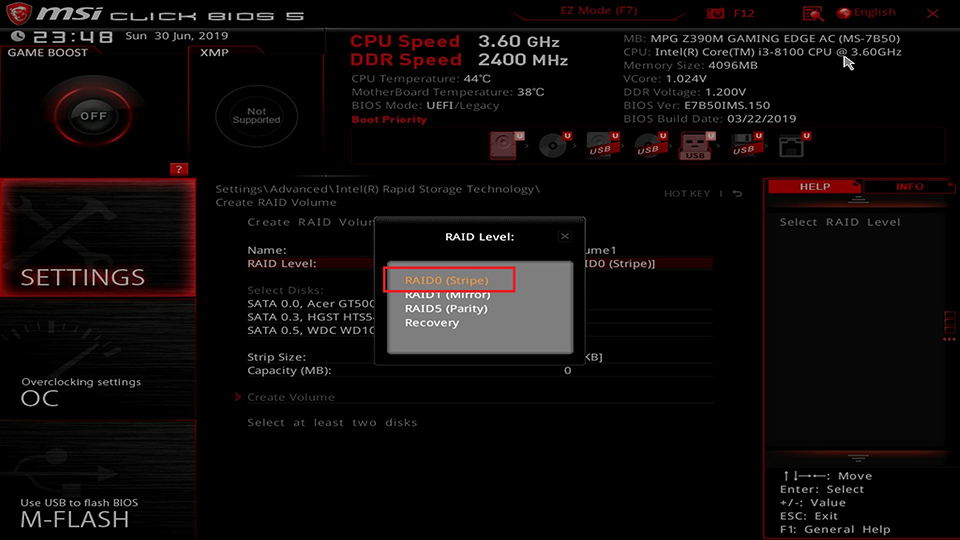
Select [RAID Level]
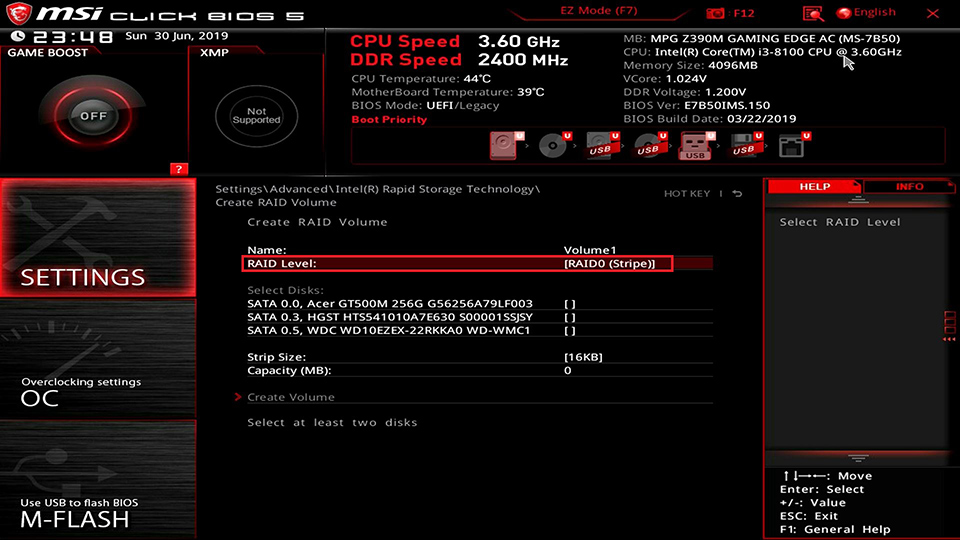
Select the RAID mode according to your need. Here we take the RAID0 as an example, select [RAID 0 (Stripe)].
RAID 0: Minimum two or more disks with the same amount of channels, protocol and capacity. RAID 0 will improve storage read and write speeds to increase the performance concurrently.
RAID 1: Minimum two or more disks with the same amount of channels, protocol and capacity. The data is backup mirrored on each drive. Provide a higher data security and reliability.
RAID 5: Minimum three or more disks with the same amount of channels, protocol and capacity. It can be seen as a compromised option for RAID 0 and RAID 1, which provide a higher performance with greater read and write speeds and data security. The downside of it is the data writing speed would be slightly slower than a single drive.
RECOVERY: When RAID1 or RAID5 fails, install a new disk and use RECOVERY mode to restore the RAID array.
Select the disks for RAID
For example, select the disks for HGST & WDC and then click [create Volume]

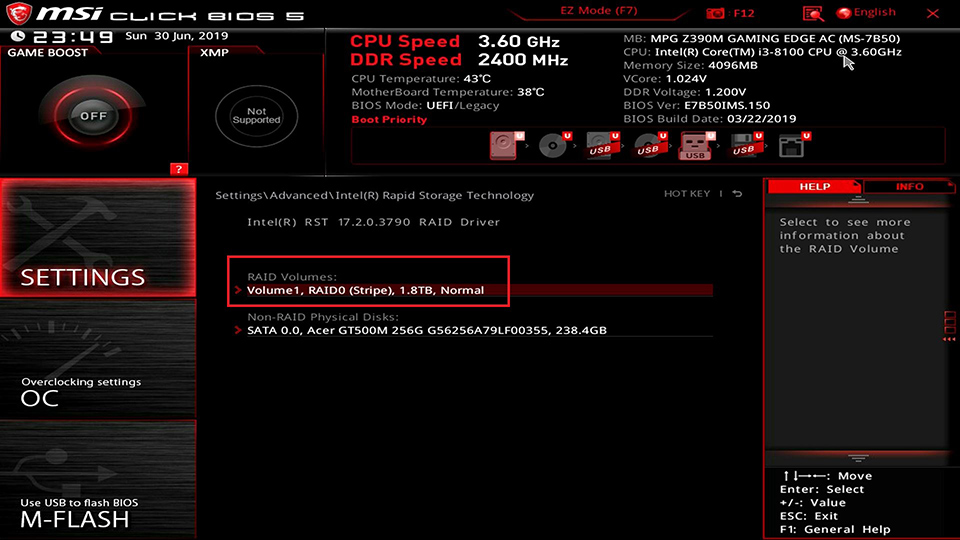
You can see the RAID Volumes [Volume1, RAID 0(Stripe), 1.8TB, Normal] has been created at this moment.
How to setup RAID array for AMD chipset
Upon powering on the PC, please start hitting the [Del] key continuously to enter the BIOS menu,
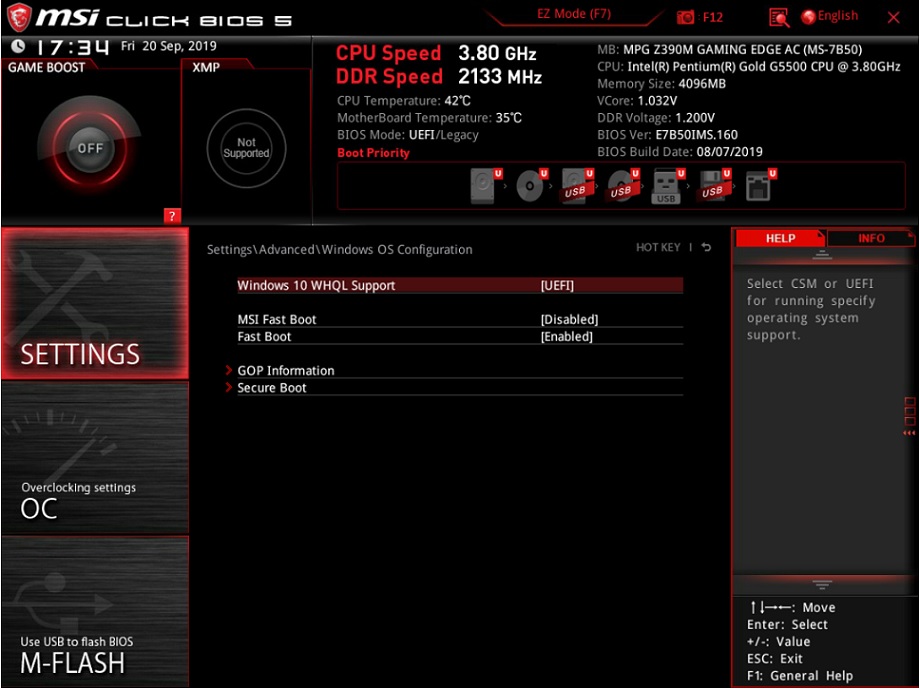
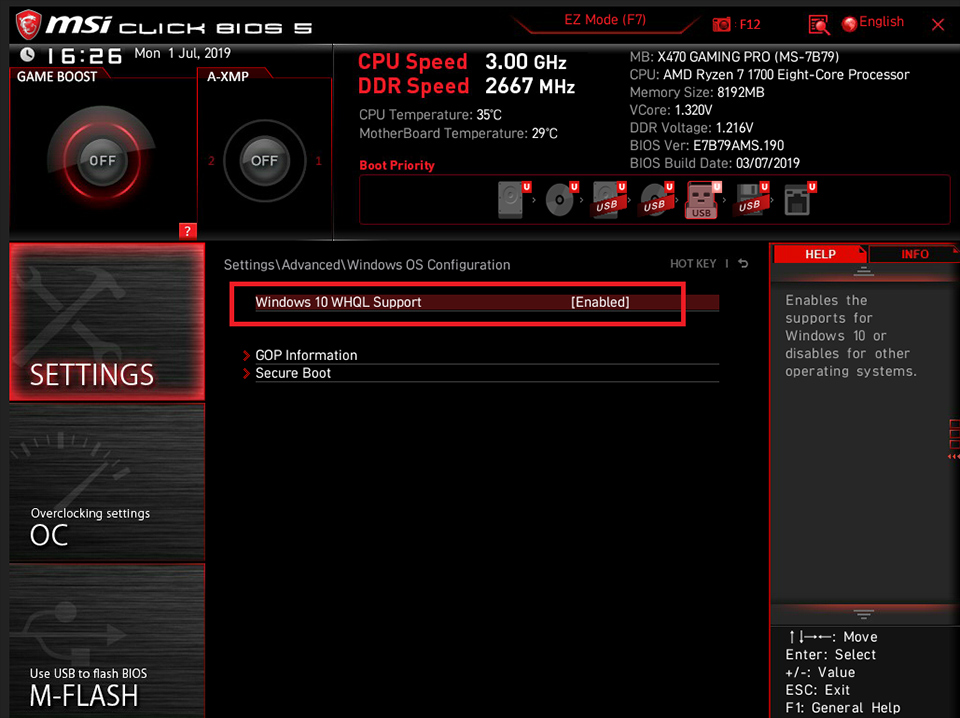
Select [SETTINGS] → [Advanced] → select [Windows OS Configurations] → Set [ Windows 10 WHQL Support] as [Enable].
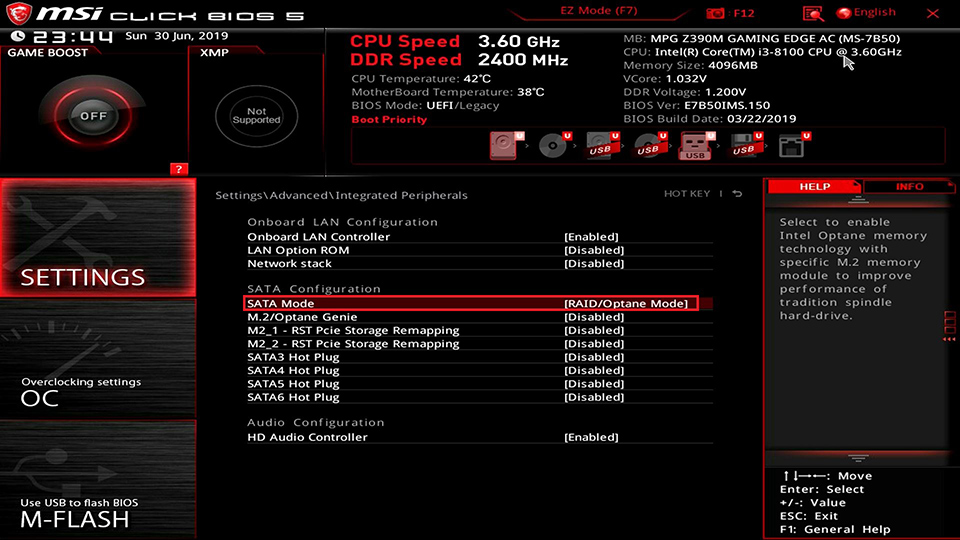
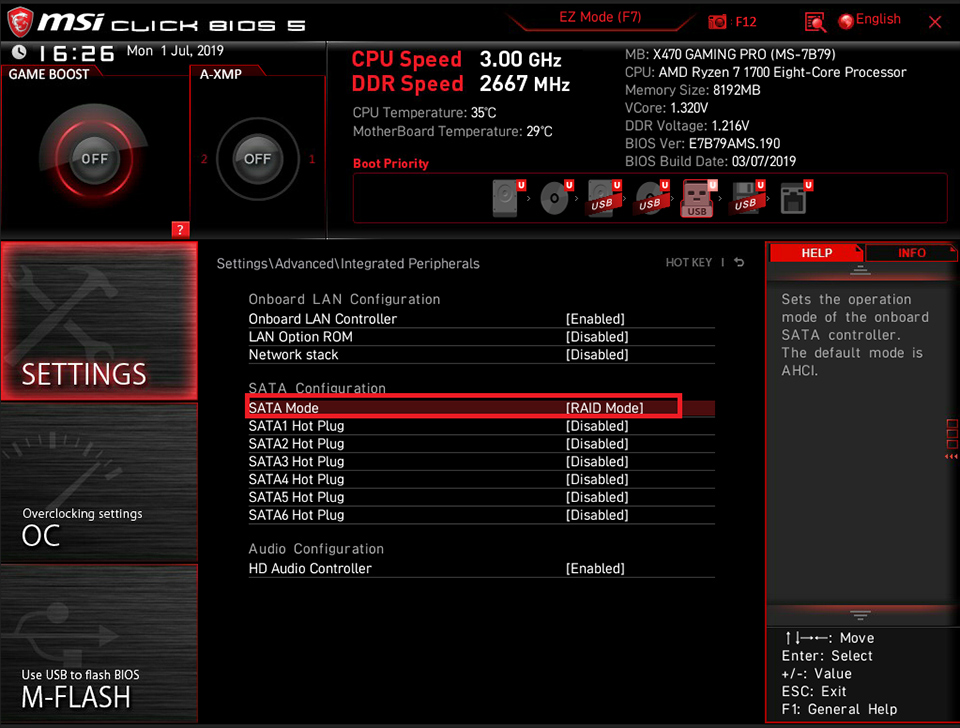
Select [Settings] → Click [Advanced] → Set up [SATA mode] as [RAID mode]
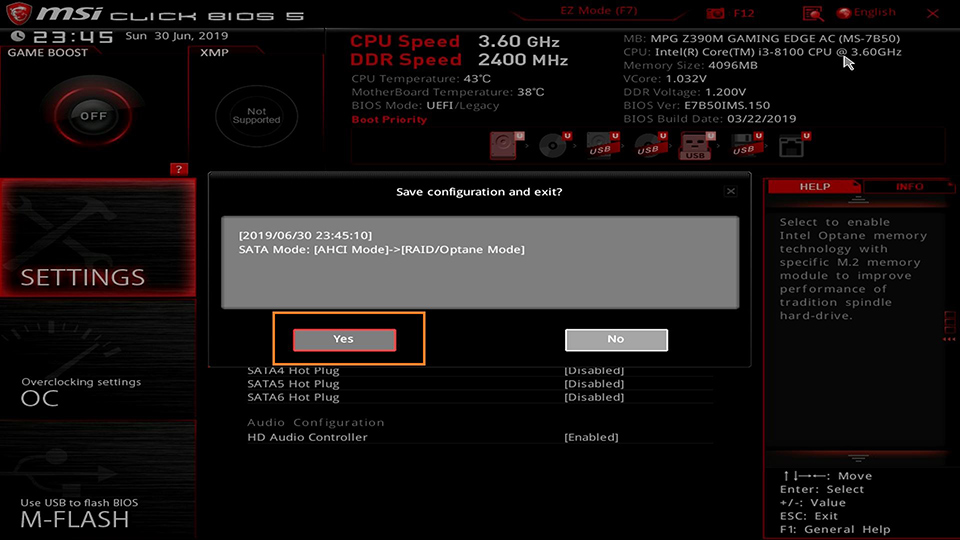
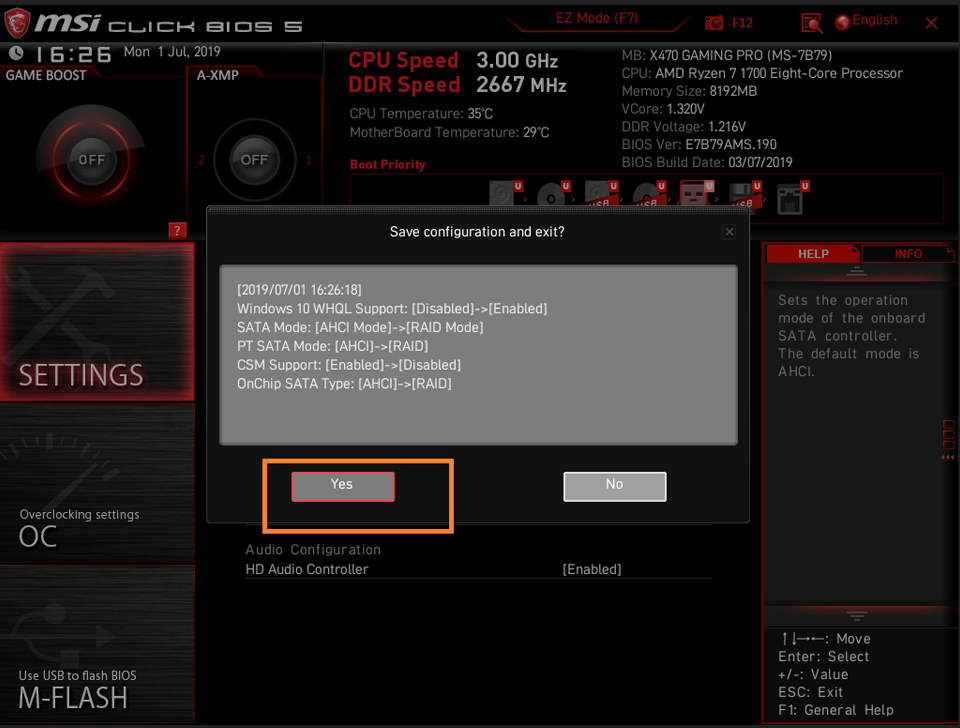
Press [F10] → Click [Yes] to save and exit, the PC will restart.
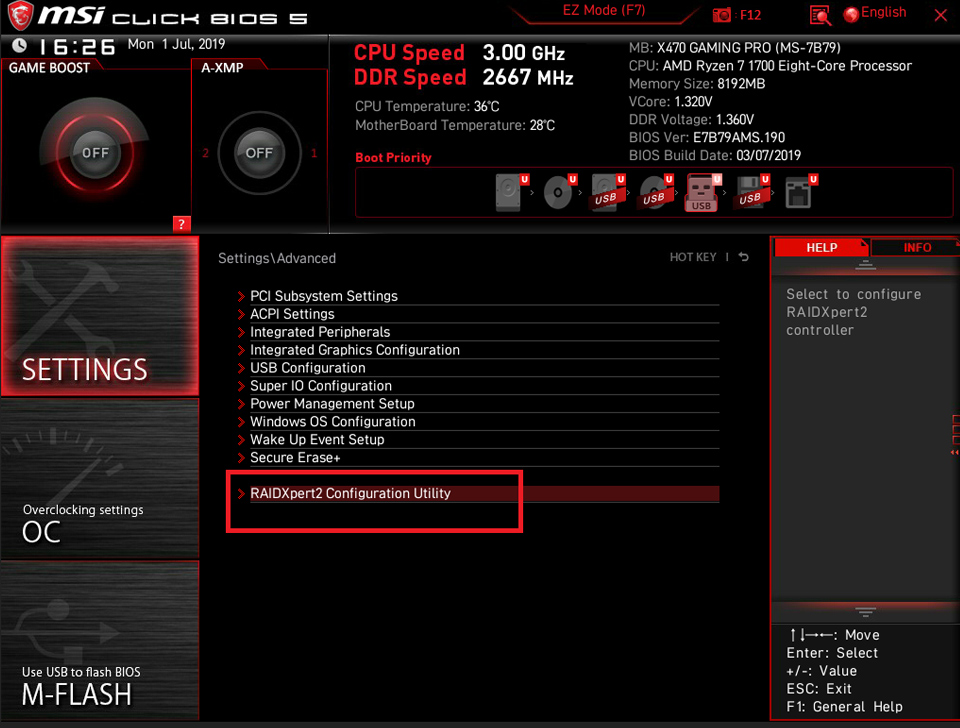
Upon powering on the PC, please start hitting the [Del] key continuously to enter the BIOS menu,
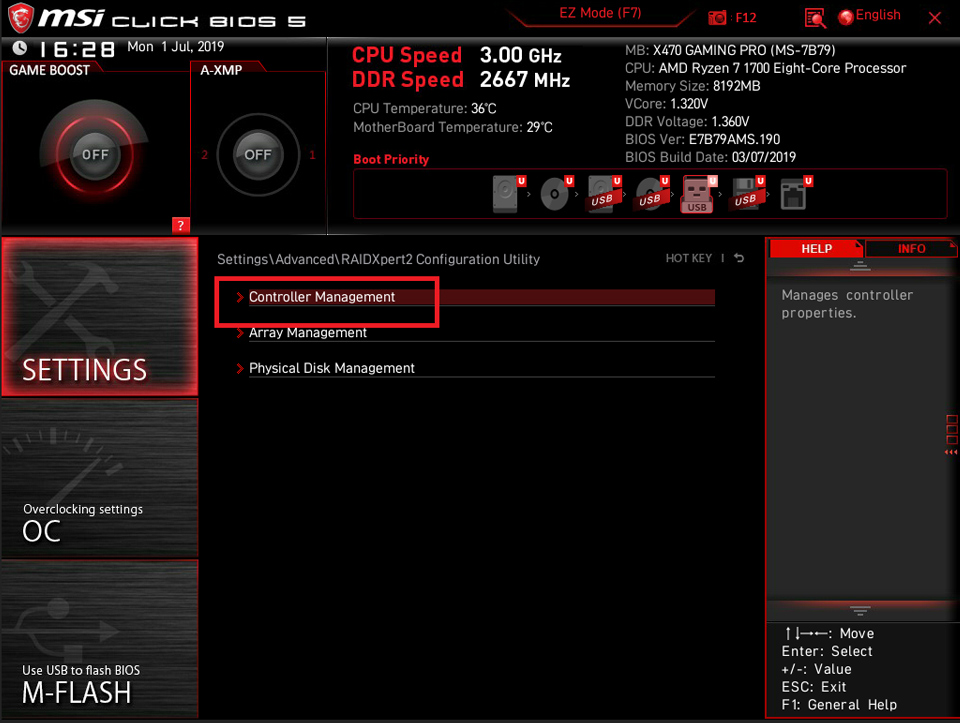
Select [SETTINGS] → [Advanced] → select [RAIDXpert2 Configuration Utility].
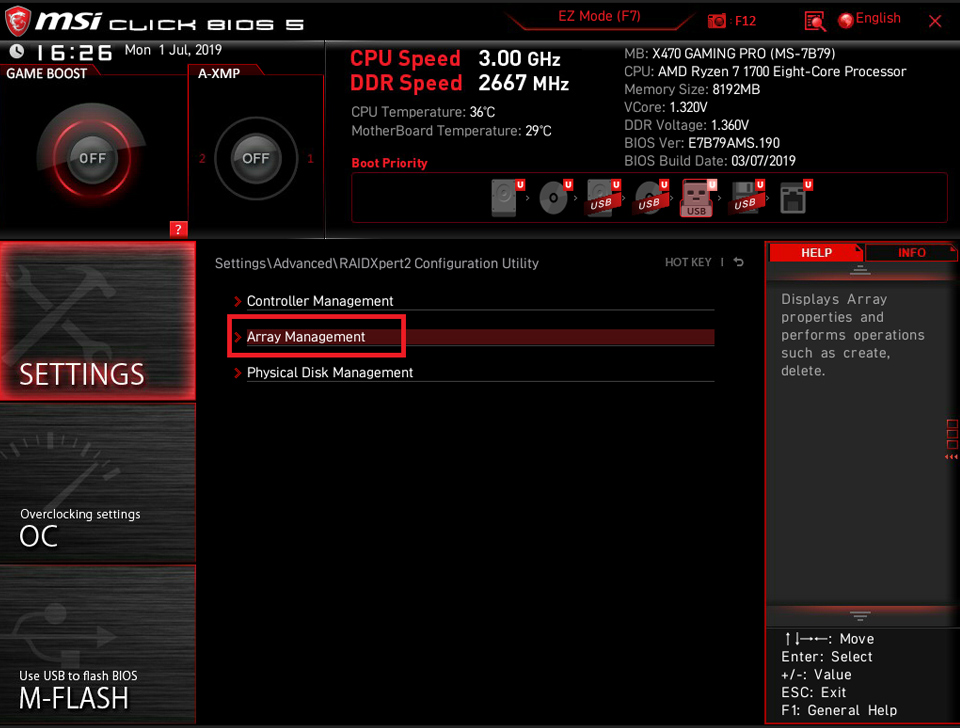
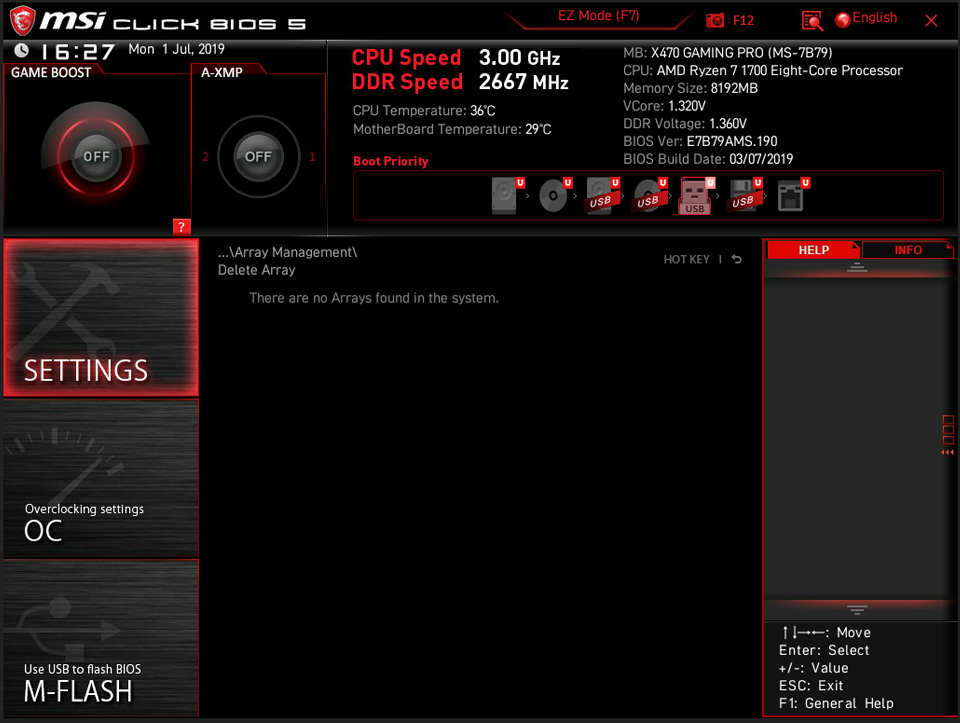
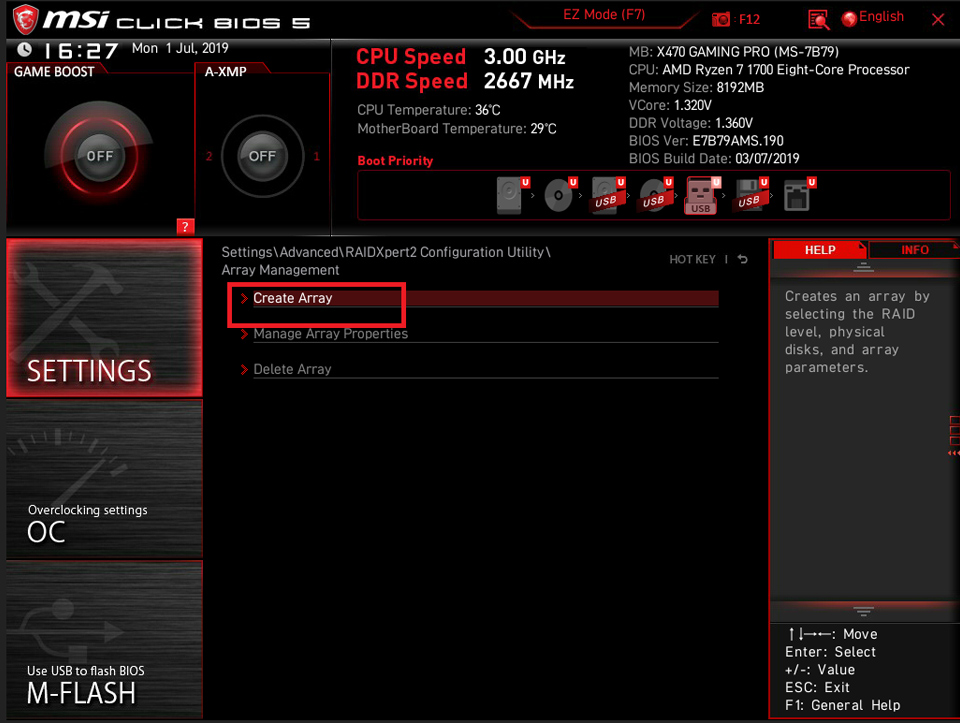
Select [Array Management]
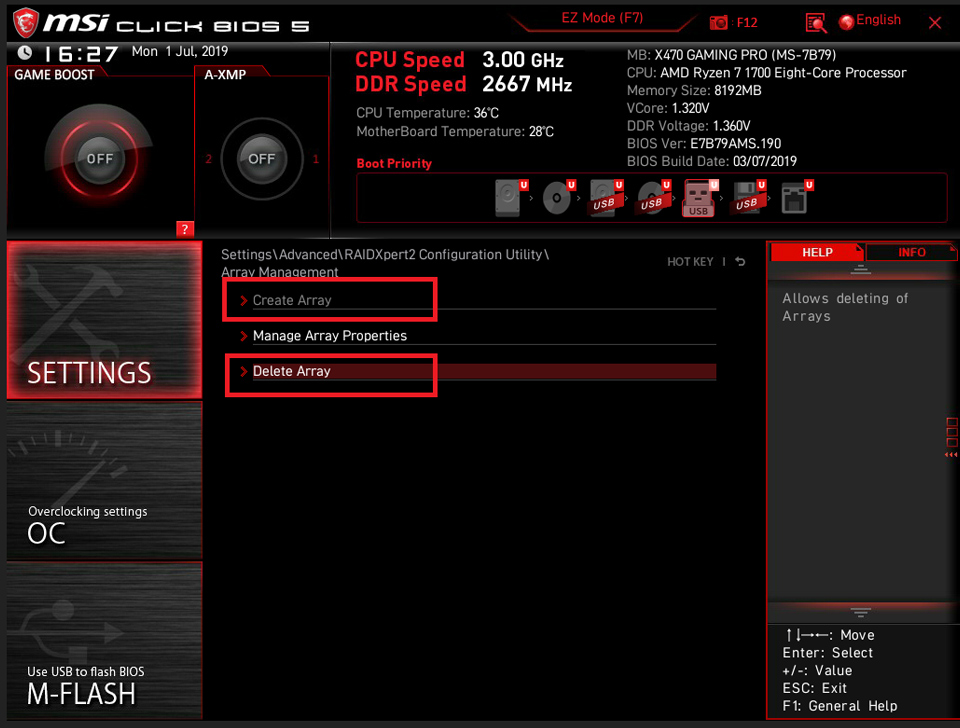
If the [Create Array] is grey out, it means the current disk is set in RAID array already. Please click [Delete Array] to re-create RAID.
Select [Check All] → Click [Delete Array(s)]

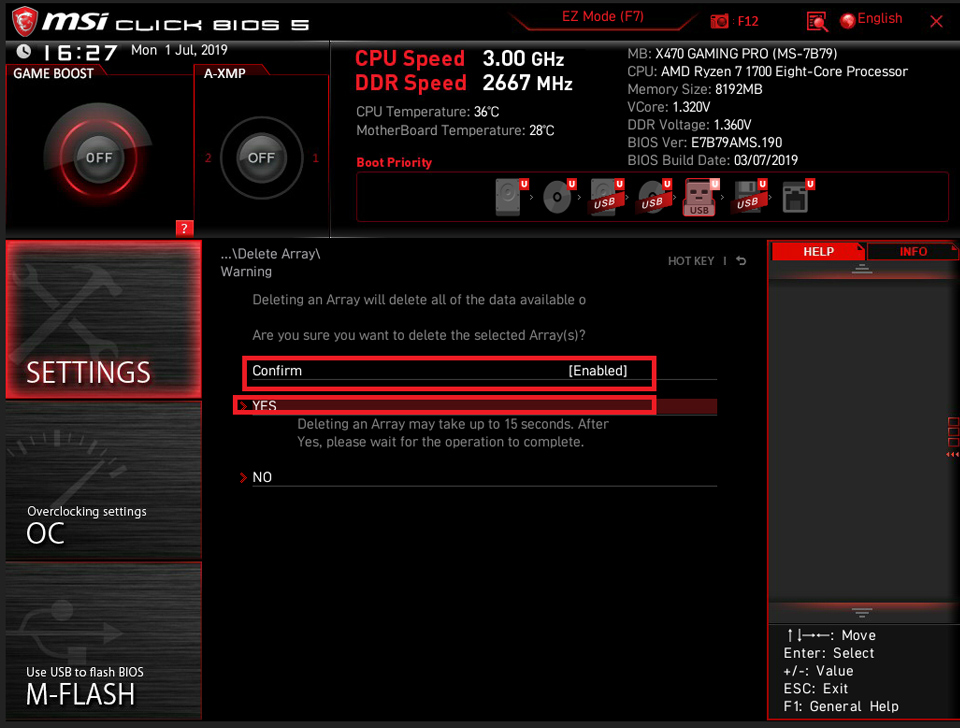
Set [Confirm] as [Enable] → and click [YES]
Noted: All of the data will be wiped, please backup your data.
The existing Arrays have been deleted.
Click [Create Array]
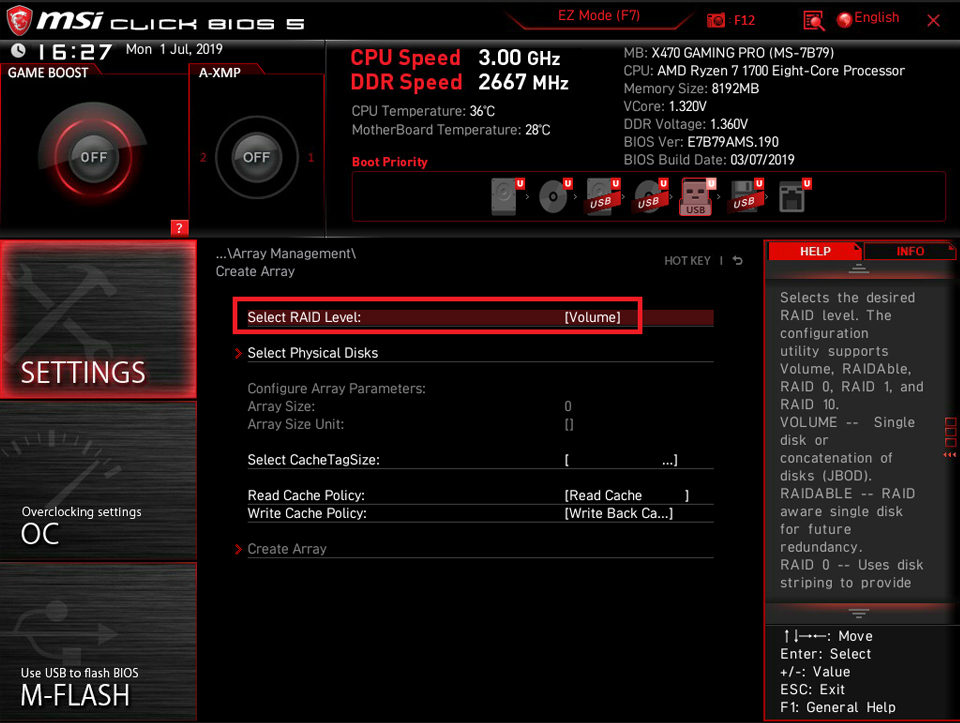
Click [Select RAID Level]
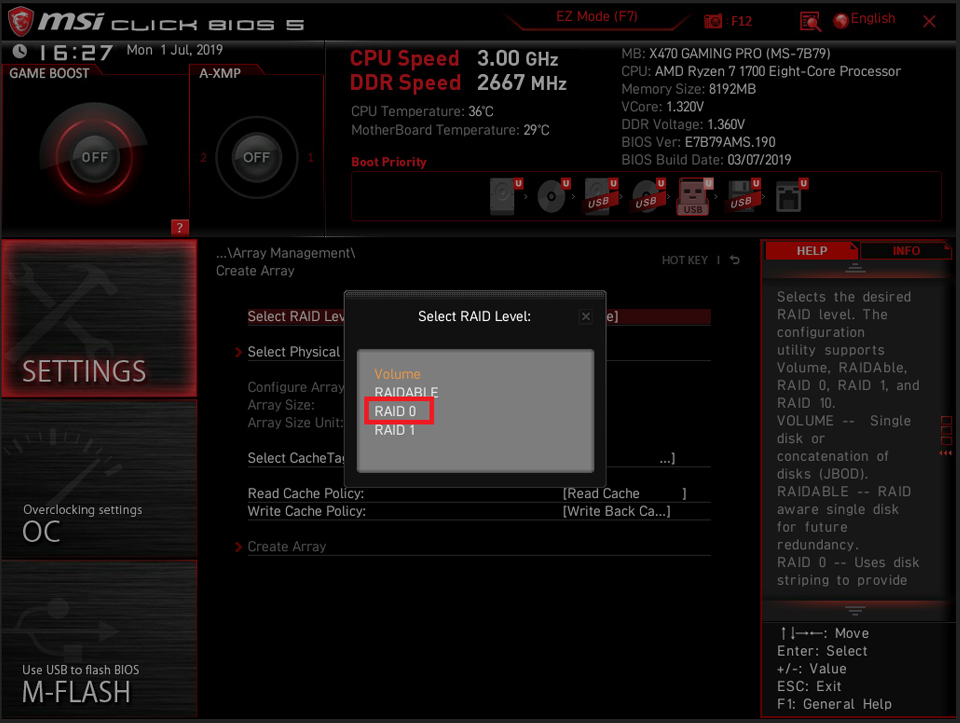
Select the RAID mode according to your need. Here we take the RAID0 as an example, select [RAID 0 (Stripe)].
RAIDABLE: For AMD chipset, please select RAIDABLE mode when using a single drive.
RAID 0: Minimum two or more disks with the same amount of channels, protocol and capacity. RAID 0 will improve storage read and write speeds to increase the performance concurrently.
RAID 1: Minimum two or more disks with the same amount of channels, protocol and capacity. The data is backup mirrored on each drive. Provide a higher data security and reliability.
RAID 5: Minimum three or more disks with the same amount of channels, protocol and capacity. It can be seen as a compromised option for RAID 0 and RAID 1, which provide a higher performance with greater read and write speeds and data security. The downside of it is the data writing speed would be slightly slower than a single drive.
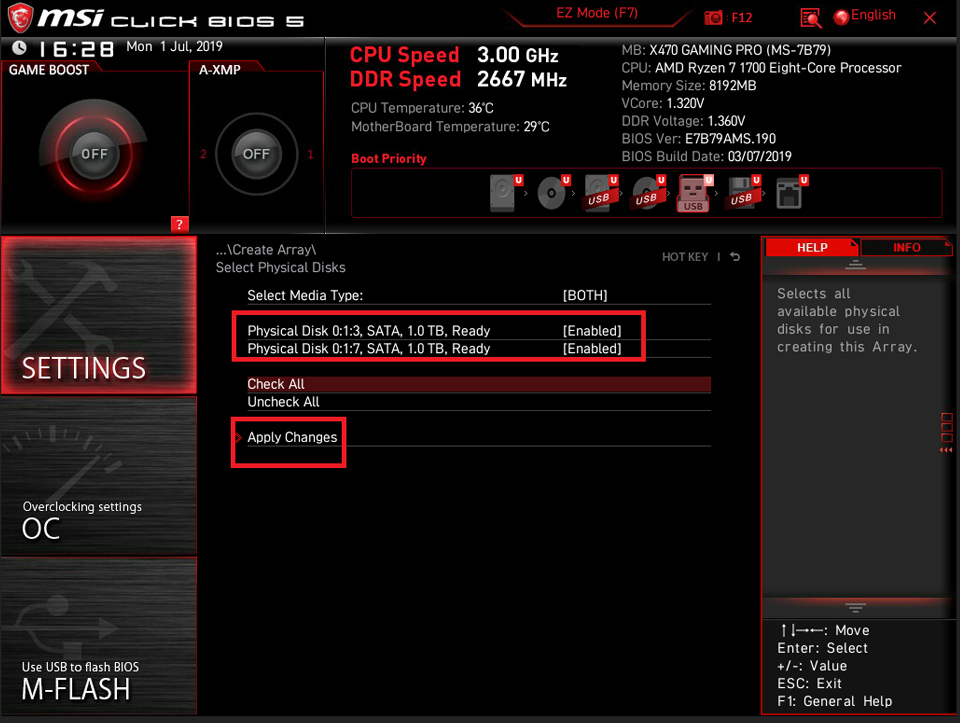
Click [Select Physical Disks]
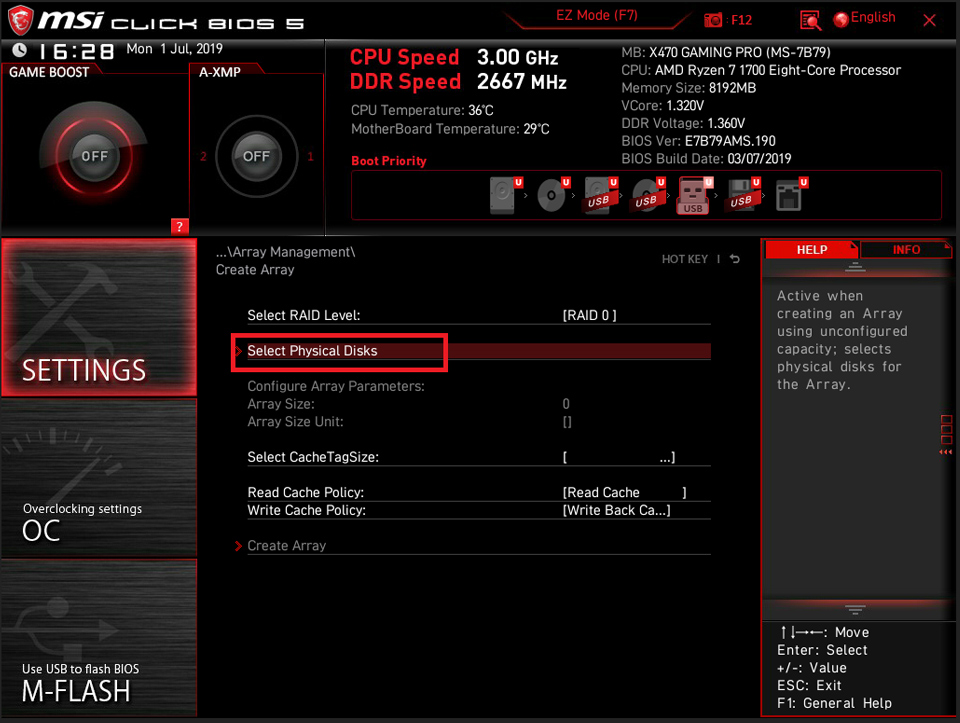
Select the RAID disks. For example: setup [Physical Disk 0:1:3]& [Physical Disk0:1:7] as [Enable] → Click [Apply Changes]
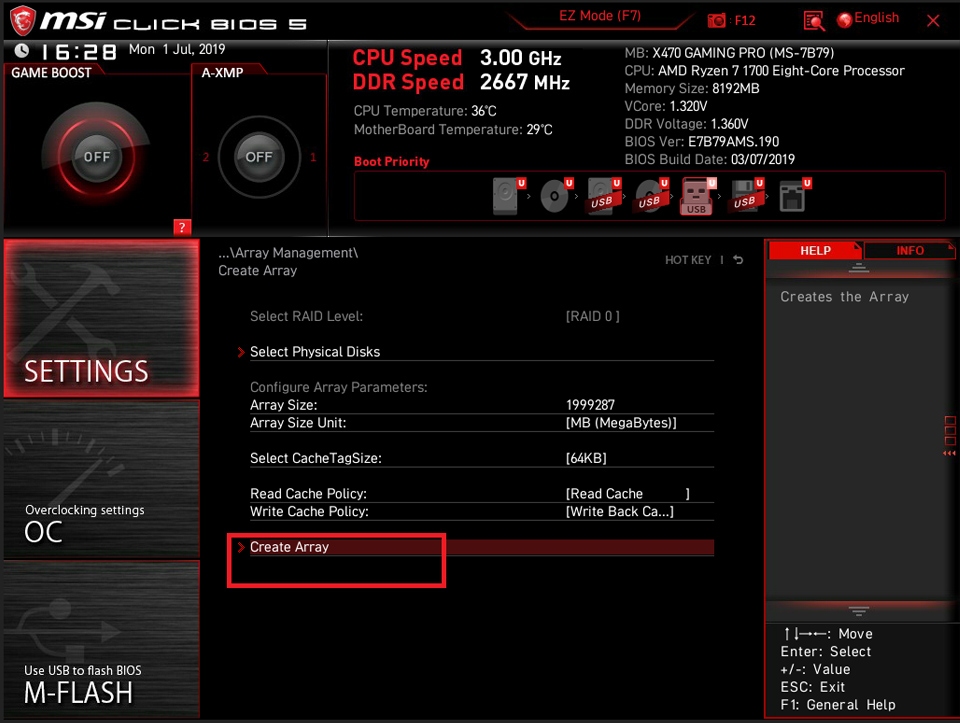
Select [Create Array]
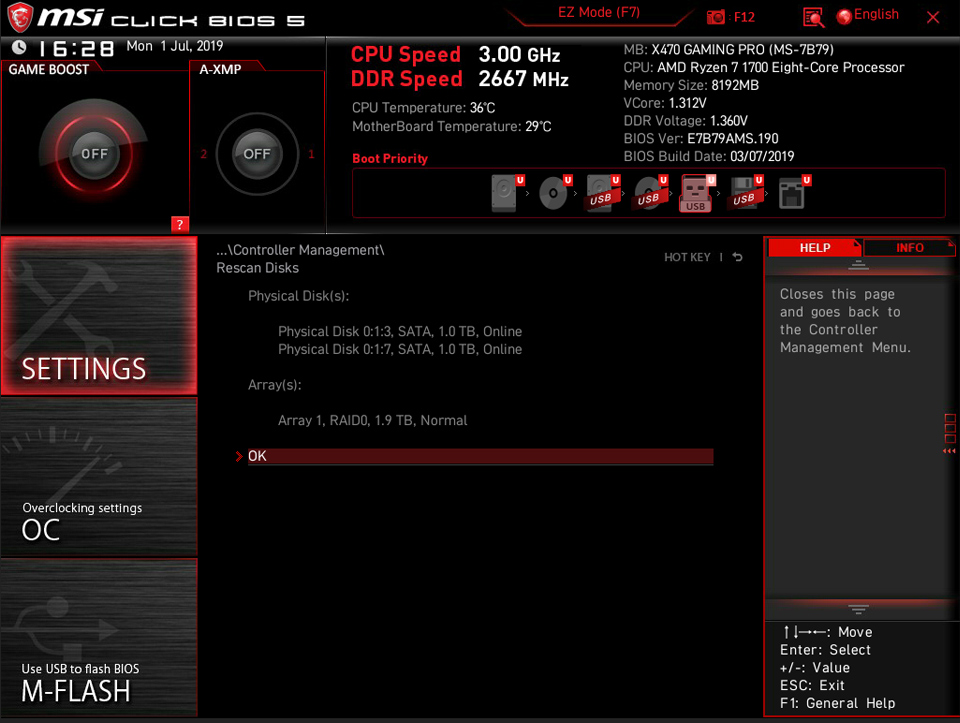
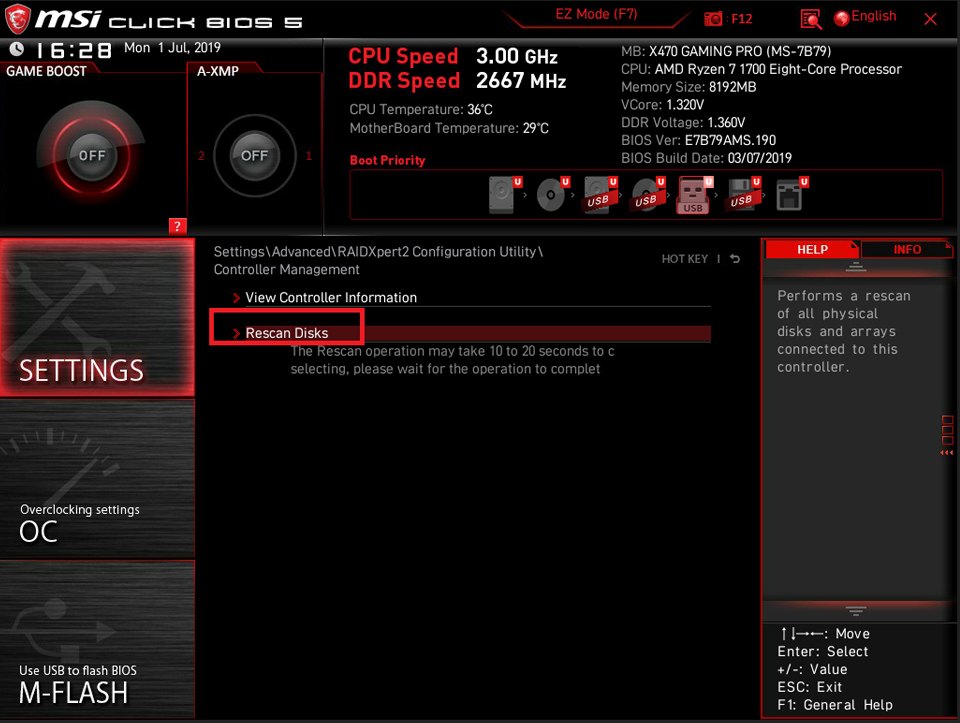
Select [Controller Management]
Select [Rescan Disks]
The RAID volume has created.