[Notebook] How to enable the camera?
If you encounter the following error message when trying to use the camera, it may be because the camera is disabled. Please follow the steps below to enable the camera:
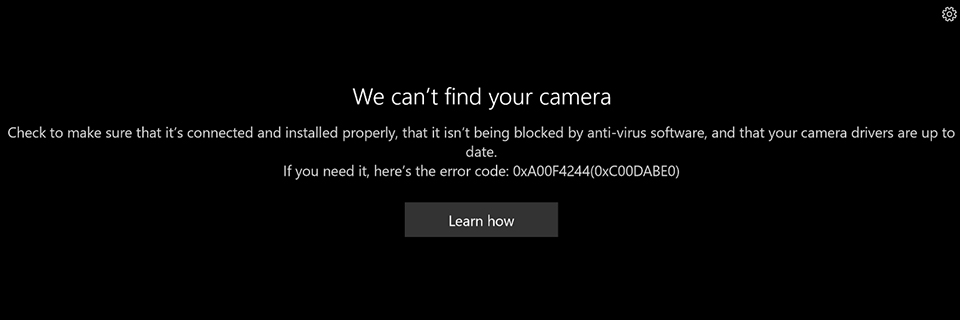
This guide will introduce two methods to enable the camera on MSI laptops.
Enable the camera using the shortcut key
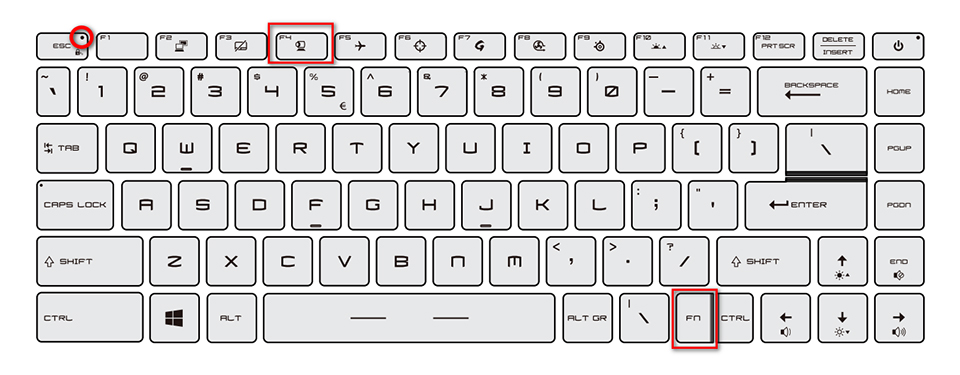
After starting up your computer and reaching the desktop screen, simultaneously press the "FN" key and the "F6" key on your keyboard to enable the camera. Please refer to the diagram below for reference.

For certain models, please make sure to check if the FN LOCK LED on the ESC key is illuminated before enabling the camera. If the LED is lit, simultaneously press the "FN" key and the "F4" key to enable the camera. If the LED is not lit, simply press the "F4" key to enable the camera directly.
For the Modern, Prestige, and Summit series, please ensure that the FN LOCK LED on the ESC key is lit before enabling the camera. If the LED is lit, simultaneously press the "FN" key and the "F6" key to enable the camera. If the LED is not lit, simply press the "F6" key to enable the camera directly.
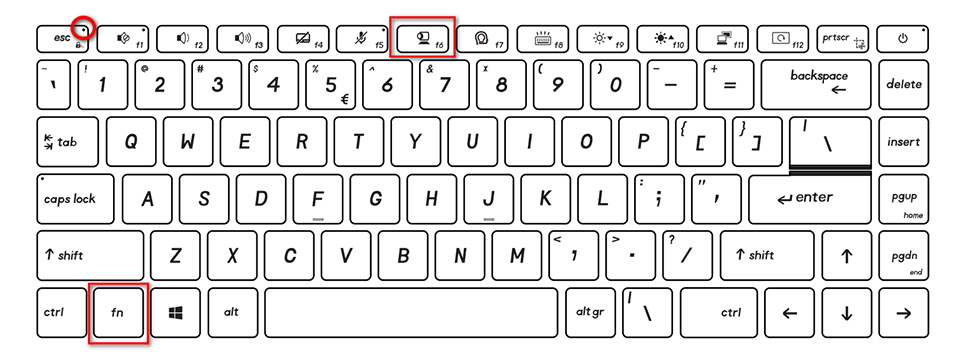
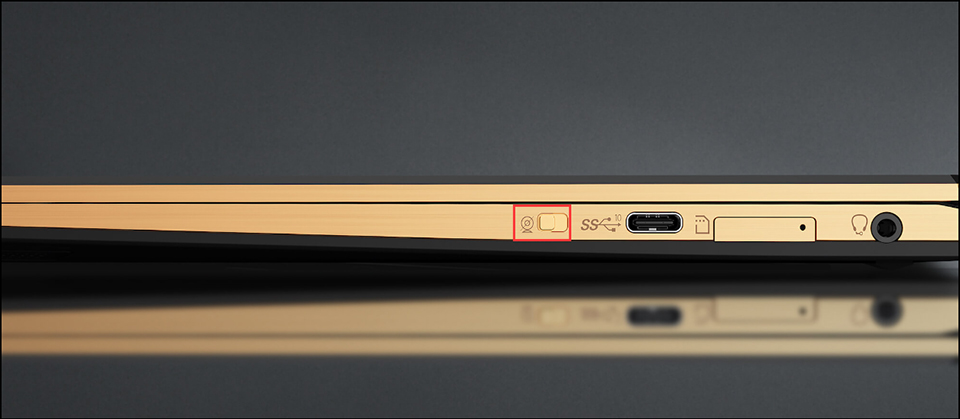
Note: For the Summit series, if you are unable to enable the camera using the shortcut key, please check if the physical camera switch on the right side of your computer is enabled.
After enabling the camera using the shortcut key, a camera activation icon will appear on the desktop, as shown below.

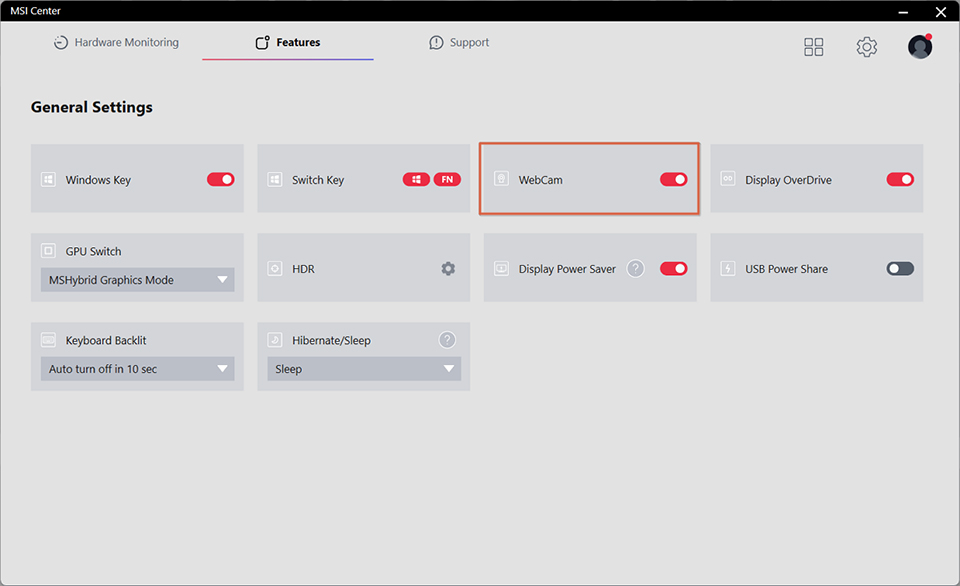
Enable the camera using the MSI Center
Open the MSI Center, select "Features" → choose "General Settings" → enable "Camera Switch."
