


[Notebook] How to Clean Install NVIDIA Graphics Card Driver
If you encounter issues such as game lag, crashes, display abnormalities, compatibility issues, or failed driver updates, a “clean install” of the graphics card driver may help resolve the problem.
- Using DDU to Remove the Current Driver
- Download and Install Drivers from the NVIDIA Website
- Download and Install Drivers from the MSI Product Page
Using DDU to Remove the Current Driver
1. Download the DDU tool to remove the current “NVIDIA Graphics Driver” from your system.
Note: The DDU download link may change over time; if you find the link broken, please visit “guru3d.com” to obtain the latest version.
2. To use the DDU tool:
2-1. Run DDU in “Safe Mode.”
If you’re unsure how to enter Safe Mode, please refer to the guide: [Notebook] How to Enter Safe Mode
2-2. Once the system restarts in Safe Mode, the DDU control interface will automatically prompt you.
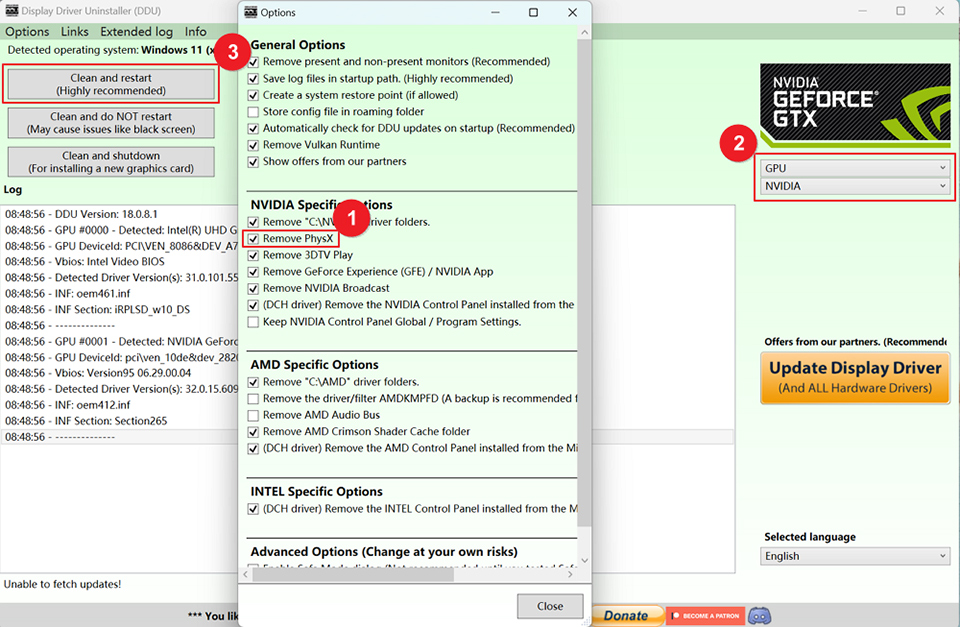
2-3. Click on “Options” and check the box for “Remove PhysX.”
2-4. Ensure that NVIDIA Graphics Card is selected, and click “Clean and restart (Highly recommended)” to remove the driver.
(The system will automatically restart once DDU has finished running.)
2-5. After the NVIDIA graphics card driver is removed, the device will display as “Microsoft Basic Display Adapter” in Device Manager.
You can then download and install the graphics card driver by following one of the methods below, based on your needs: The NVIDIA website offers the latest drivers (referred to as the generic drivers). The MSI website provides slightly older drivers that have been verified by MSI.
Download and Install Drivers from the NVIDIA Website
1. Visit the NVIDIA official website and click on “Drivers” to go to the driver download page.
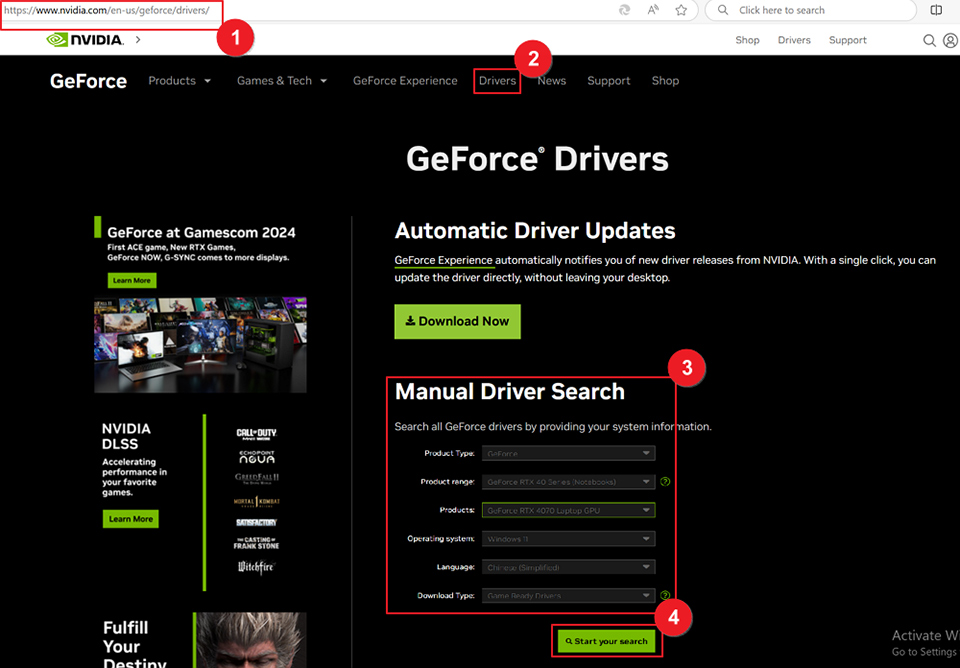
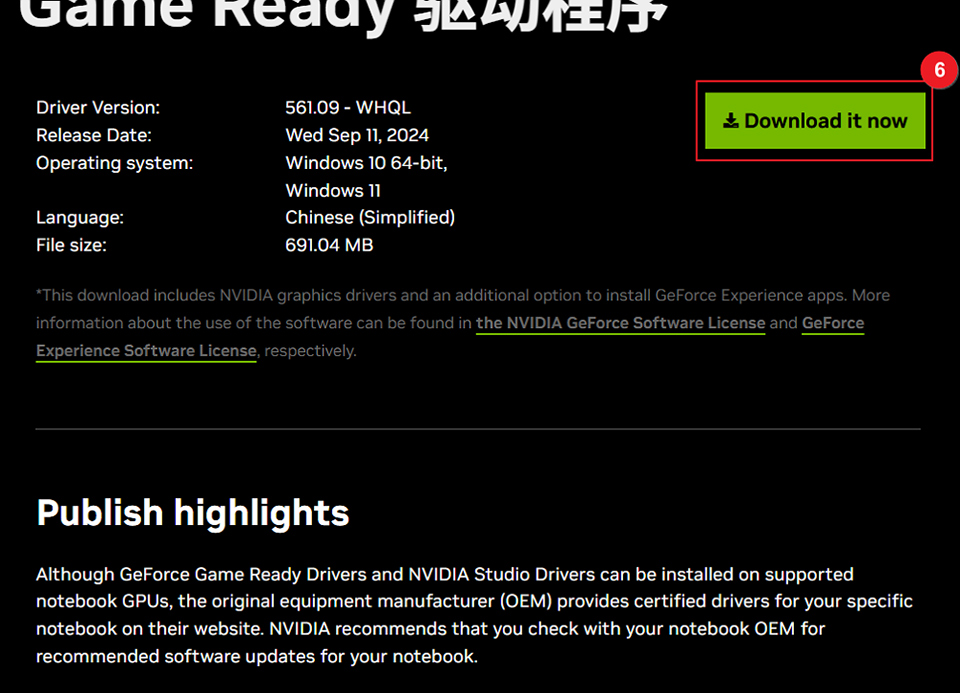
2. Search for and obtain the latest driver based on your device, click “Get the download,” which will redirect you to the download page, then click “Download it now.”

3. Once downloaded, open the application and follow the on-screen instructions to install the graphics card driver.
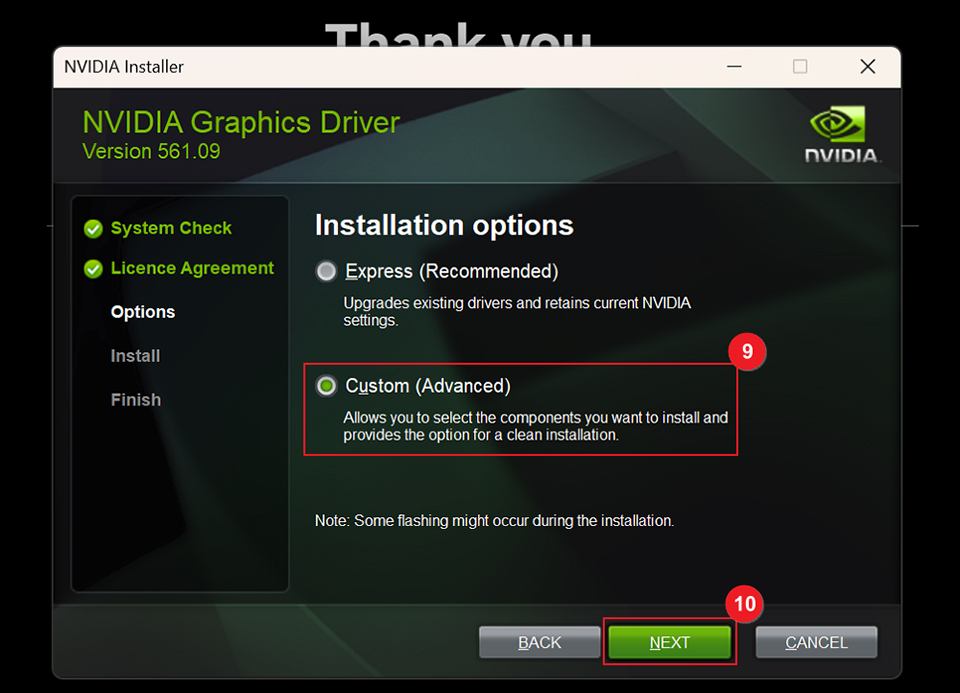
Note: During installation, select “Custom (Advanced)” → “Perform a clean installation,” as shown in the image.

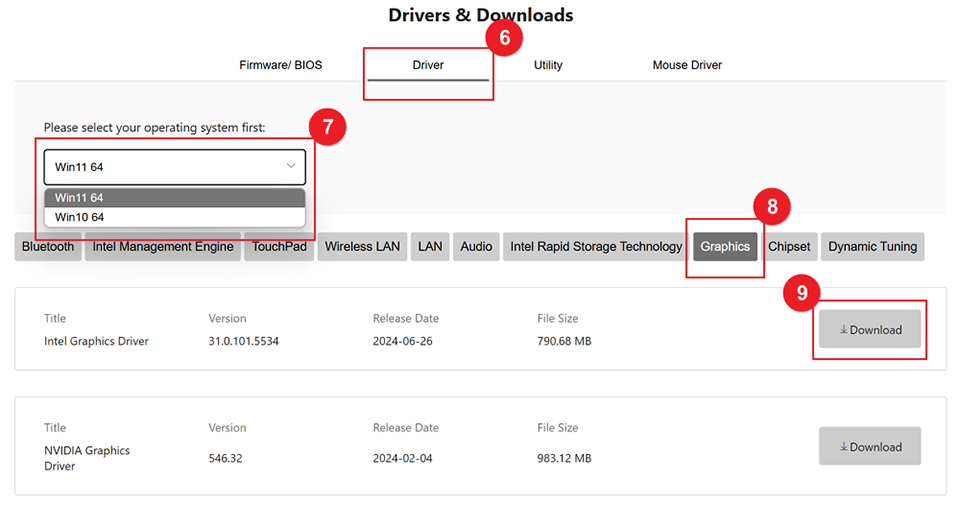
Download and Install Drivers from the MSI Product Page
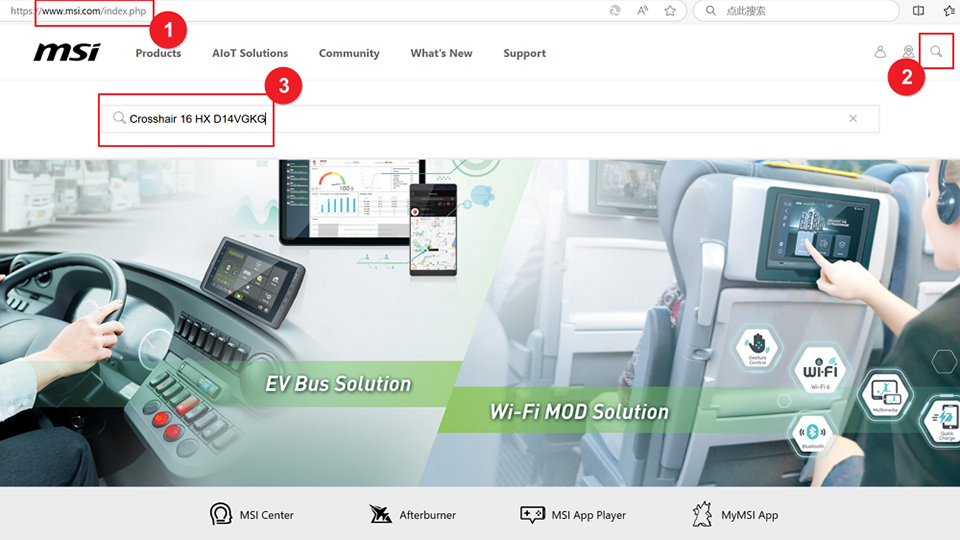
1. Go to the MSI official website, click the “magnifying glass” icon in the upper right corner, and search for your model. For example, enter “Crosshair 16 HX D14VGKG” and press “Enter” to search.
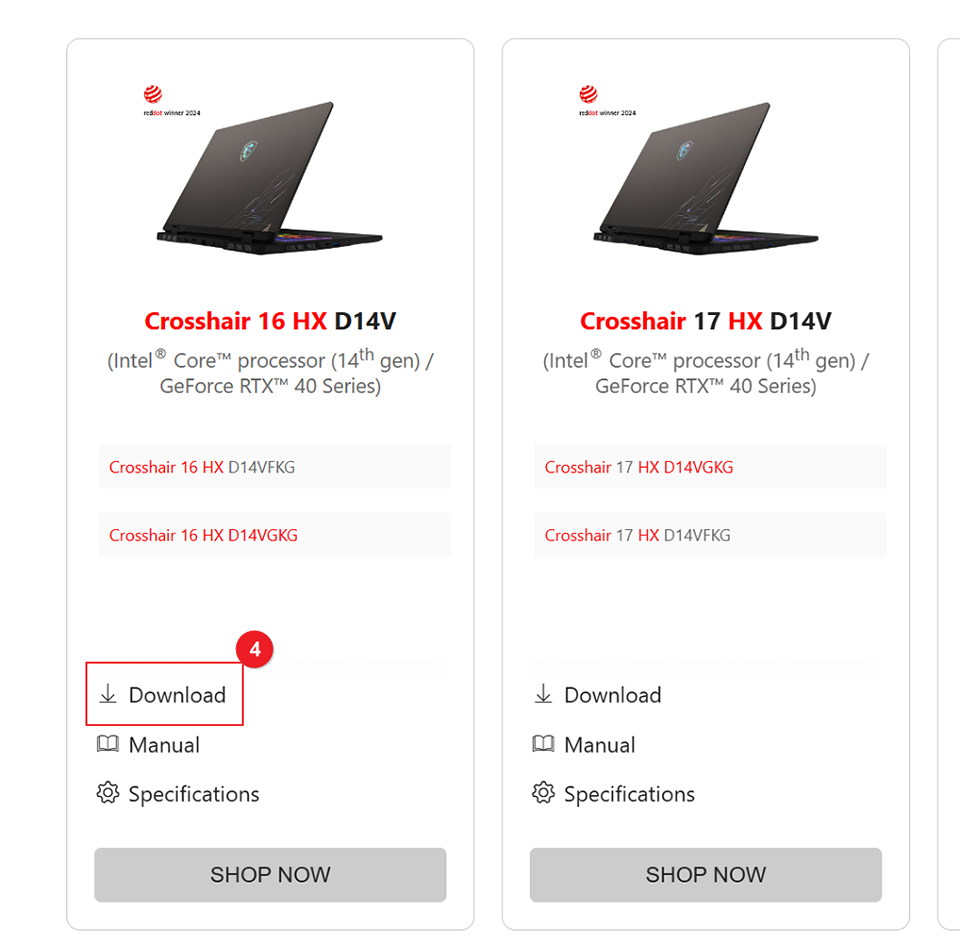
2. Find the model, then click “Download.”
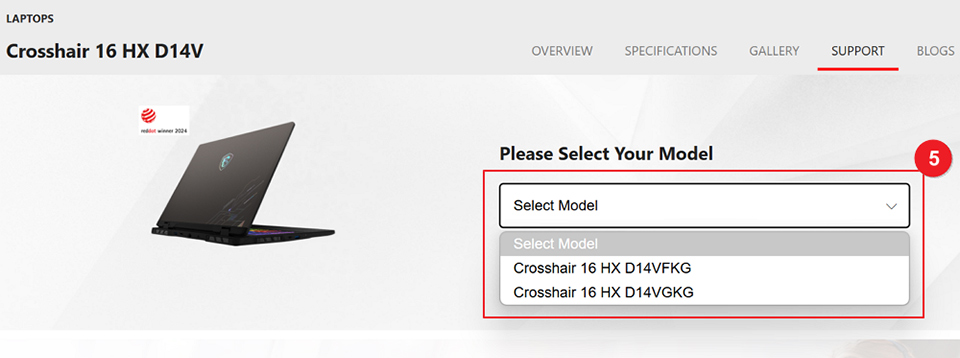
3. After selecting the model, you will be directed to the homepage.
4. Choose “Driver,” select “WIN11 64” under the operating system options to open the driver selection box, click “Graphics,” and then click “Download.”
5. After downloading, extract the file, double-click “Setup” to run the application, and follow the on-screen instructions. Once installation is complete, please restart your computer.